Sunday, February 27, 2011

PANNA COTTA WITH OATMEAL FLORENTINES - DARING BAKERS

dk-group-1
When the Daring Bakers deadline approaches I always tend to reflect on how weeks pass incredibly fast and it never fails to surprise me to see that it is impossible to have a grip on it. For fun I decided to count the number of challenges I have accomplished since I joined this group at the end of 2007 (first DB post). It was with much pride that I discovered I have been a faithfull member of the Daring Bakers since 3 years and 5 monthes. Until now I have made 42 treats under high-pressure, spent countless hours in the kitchen sweating and cursing, never skipped one event and as I'm the queen of last-minute baking sprees I was never able to get started before the last moment, thus increasing my overall stess like crazy....

Although it is an activity I enjoy it is sometimes difficult to find the time to bake for the Daring Bakers
as the recipes are time-consuming and the weeks go by at light speed. Not forgetting that the post-baking process (taking pictures and writing my posts) cannot be done hastily and demands efforts, at least not in my case. This hobby is quite exhausting and the work we have to provide is generally arduous. One has to be creative, concentrated and well-organize, plan things in advance and have a clear mind in order to succeed. You really have to be a passionate baker to carry out the tasks as it requires skills and lots of determination.

Florentines & Panna Cotta Picnik collage 4 bis
The February 2011 Daring Bakers' challenge was hosted by Mallory from "A Sofa in the Kitchen" who chose to challenge everyone to make "Panna Cotta" from a Giada De Laurentiis recipe and Nestlé "Florentine Cookies". As you can see, this month's trial was thankfully not intimidating at all and the recipes were no backbreakers. Although it was the first time that I prepared both specialities I was unusually laidback and enjoyed baking casually without breaking into a cold sweat. A first for me!

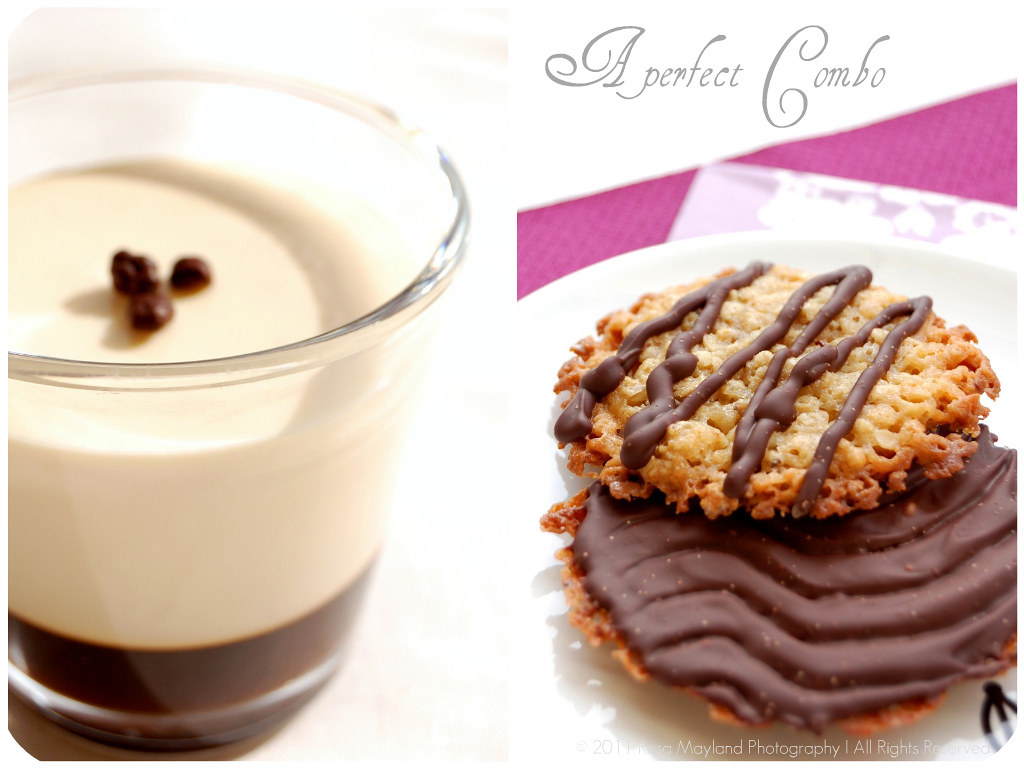
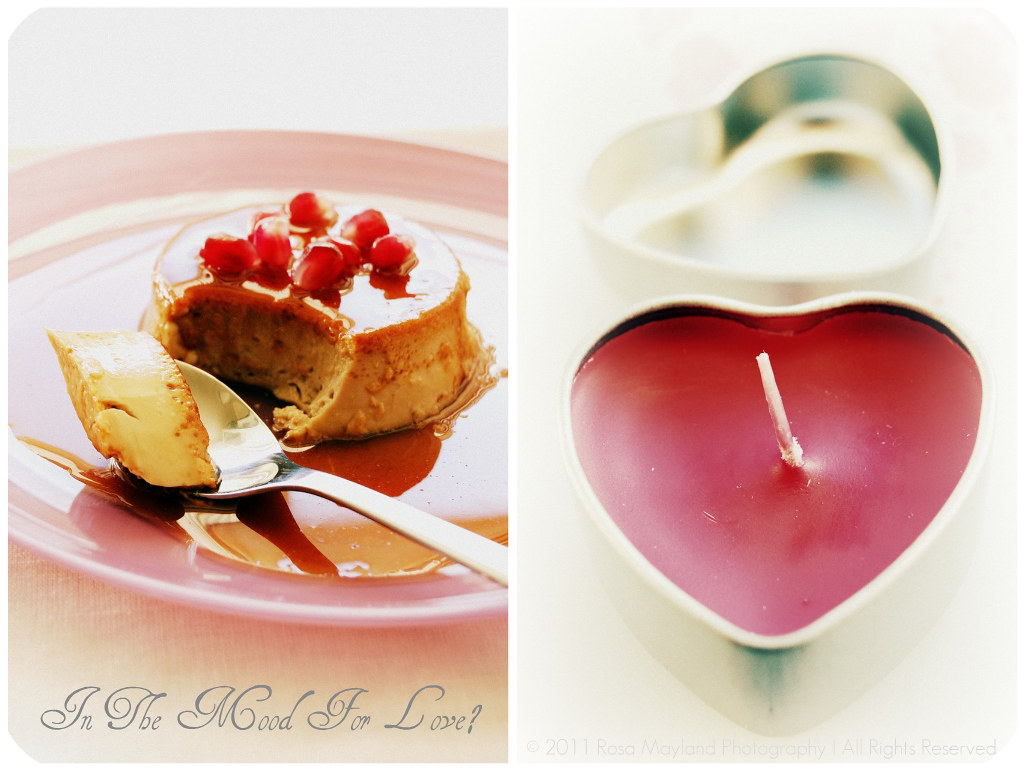
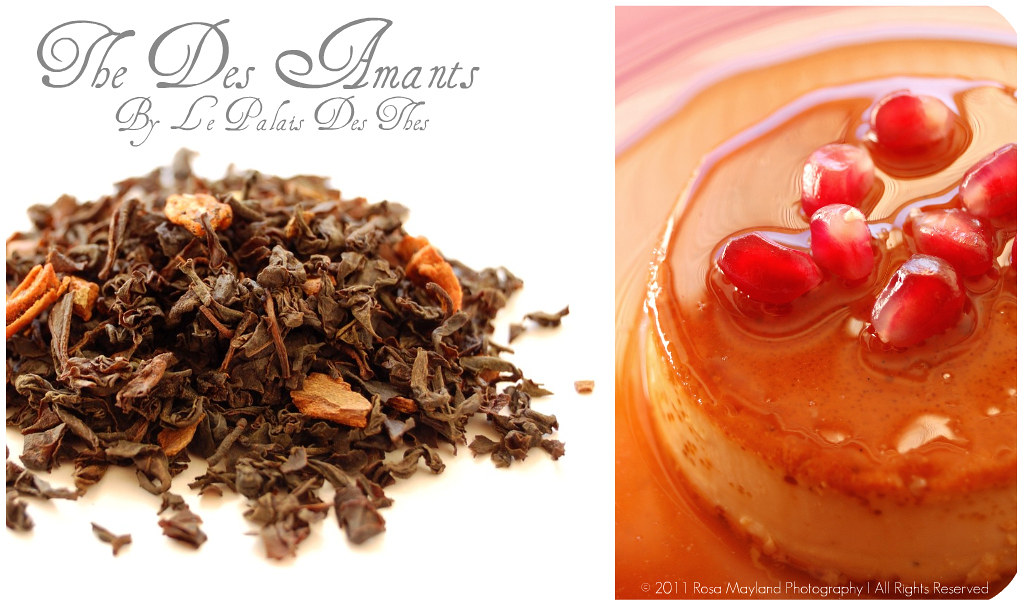
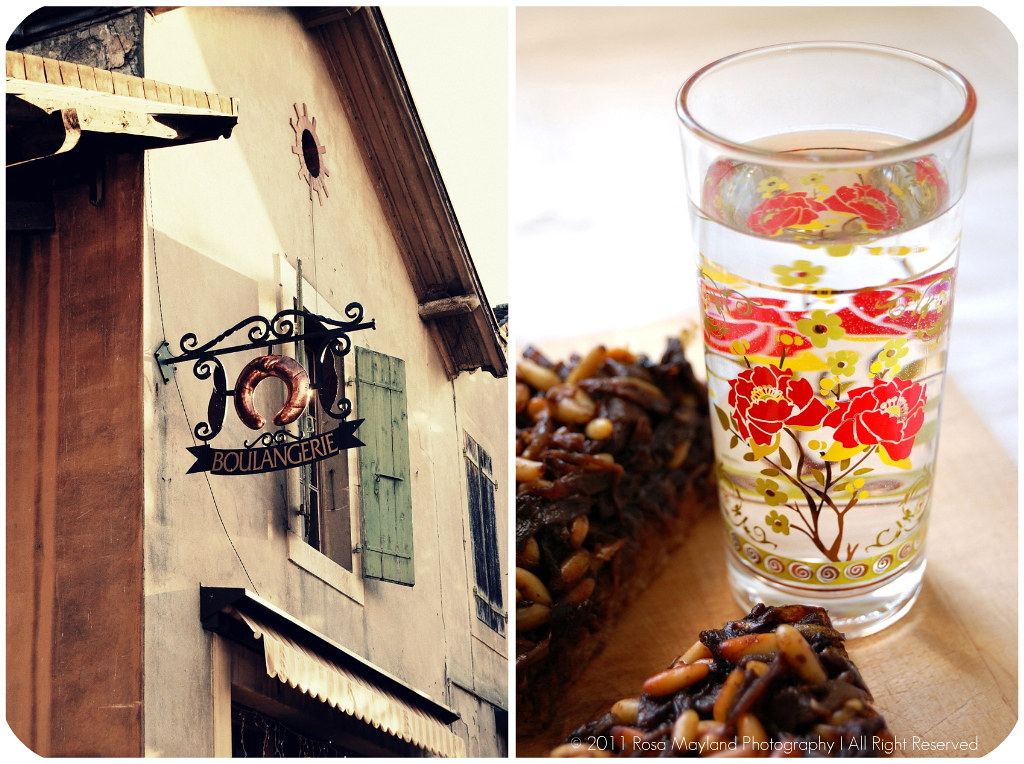
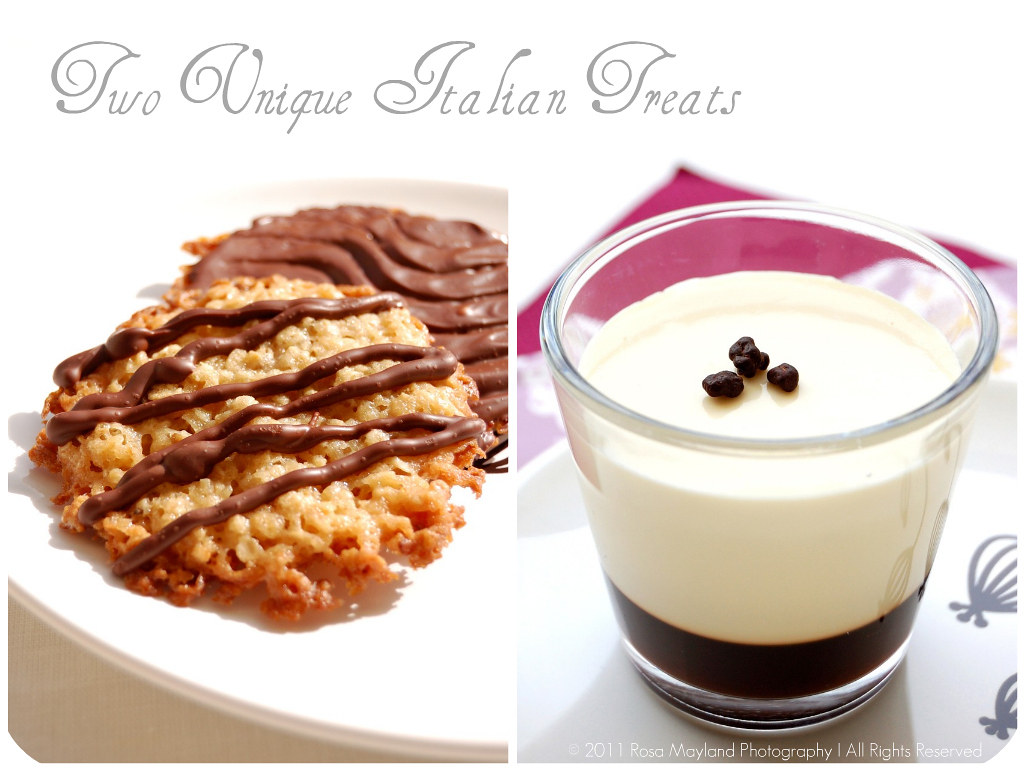
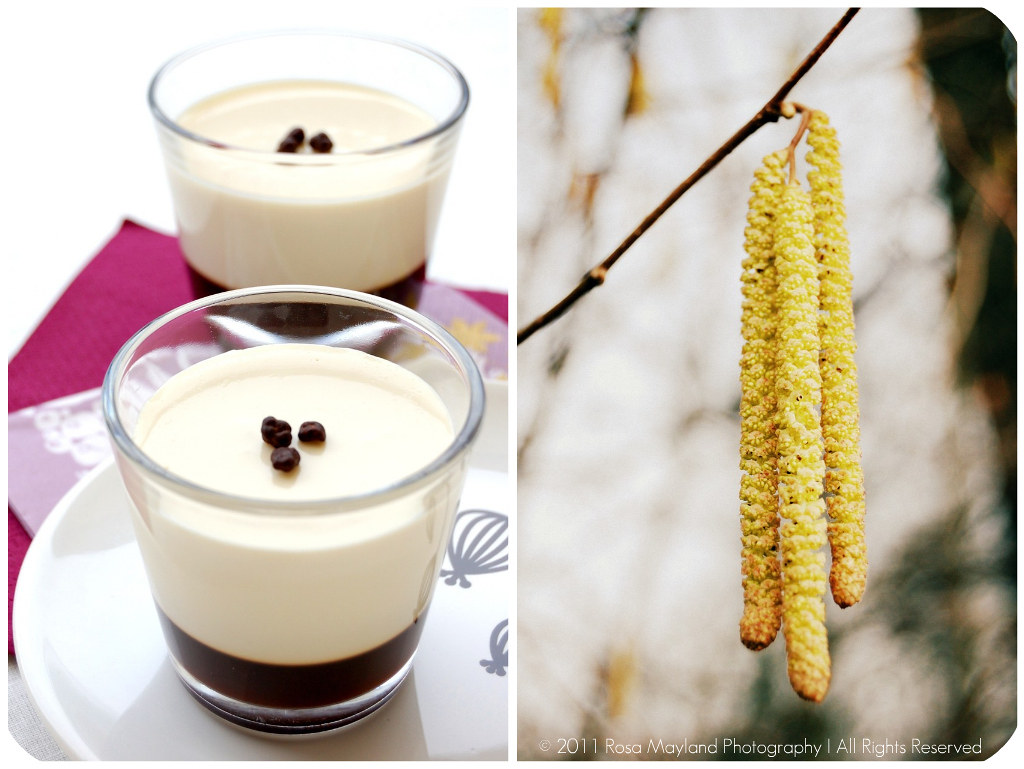
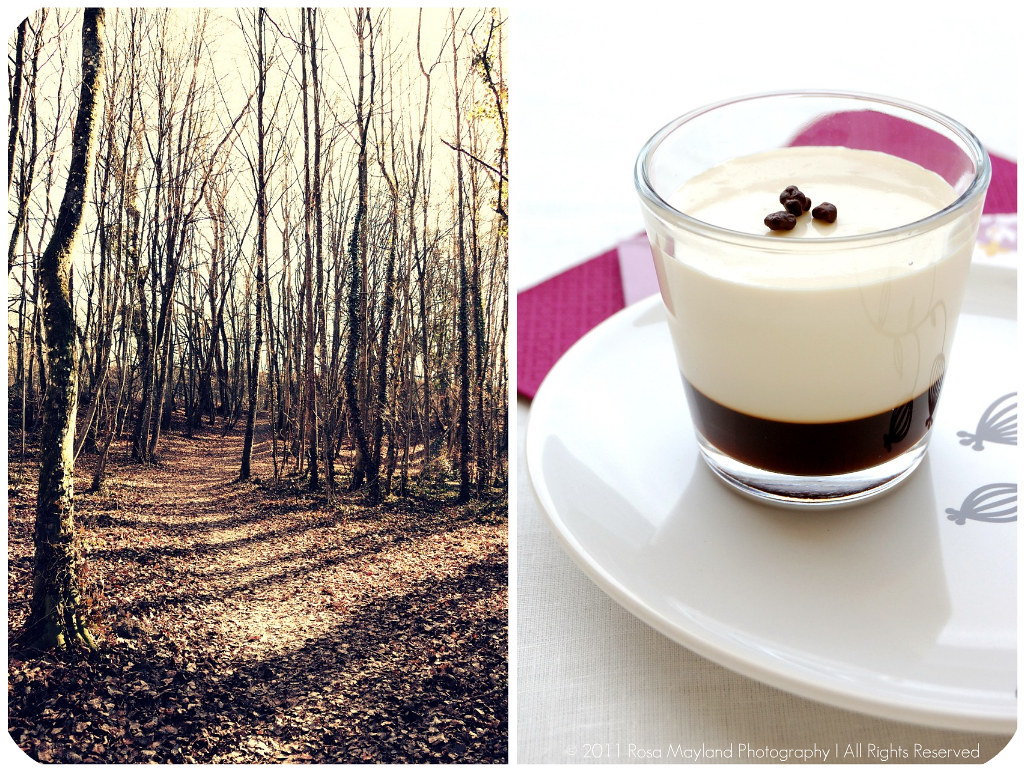
"Panna Cotta" and "Florentine Cookies" are two Italian delicacies which are very popular with foodies all around the world. The first dessert item hails from Piemont (northern part of the country), but can be found everywhere in Italy. "Panna Cotta" means "cooked cream". It's origin is unclear yet there are theories that suggest that in the mountainous regions unsweetened cream (to which was incorporated fish gelatine made with the bones) was eaten with plain, fresh fruits or hazelnuts (sugar was added to the preparation only lately). Similar versions can be found in Greece/Turkey (Kazan Dibi), Finland (Hedelmärahka) and France (Blanc-Manger). The second goodie is accredited to Austrian bakers, but it owe's it's origin from Florence in Tuscany. Those wonderful round lace biscuits are traditionally confectioned with nuts (generally sliced almonds), candied fruits (orange, cherries, lemon etc...), caramel and chocolate.

I must admit that I was a little skeptical and not really thrilled at the idea of using a Nestlé recipe because I am really not a big fan of this big multinational corporation considering the fact that their methods are far from being the most sustainable (deforestation/palm oil) or humane (baby milk), that what they produce is far too industrial for my taste (junk/plastic/additive-ladden food - yuck!) and not healthy, and that they literally "eat" other enterprises, destroy their soul (what made them unique) and the quality of the original products (for example Cailler Chocolates, Cereal Partner's Shredded Wheats & Rowntrees' After Eights are really less good than when they were not made by Nestlé - and the list goes on unfortunately). I thought that we would rather be making a more artisinal and traditional recipe created by a professinal pâtissier (I mean, aside from being the "guru" of processed food, Nestlé is surely not an authority in the "real" food domain - nothing Slow-Foodish about them).

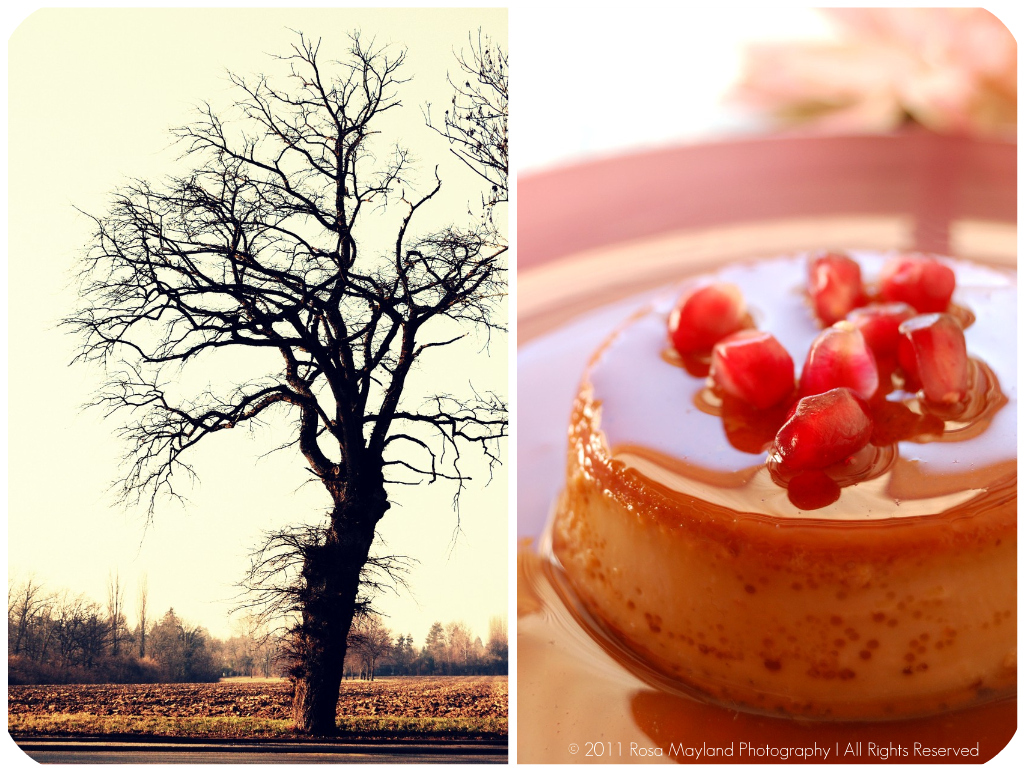
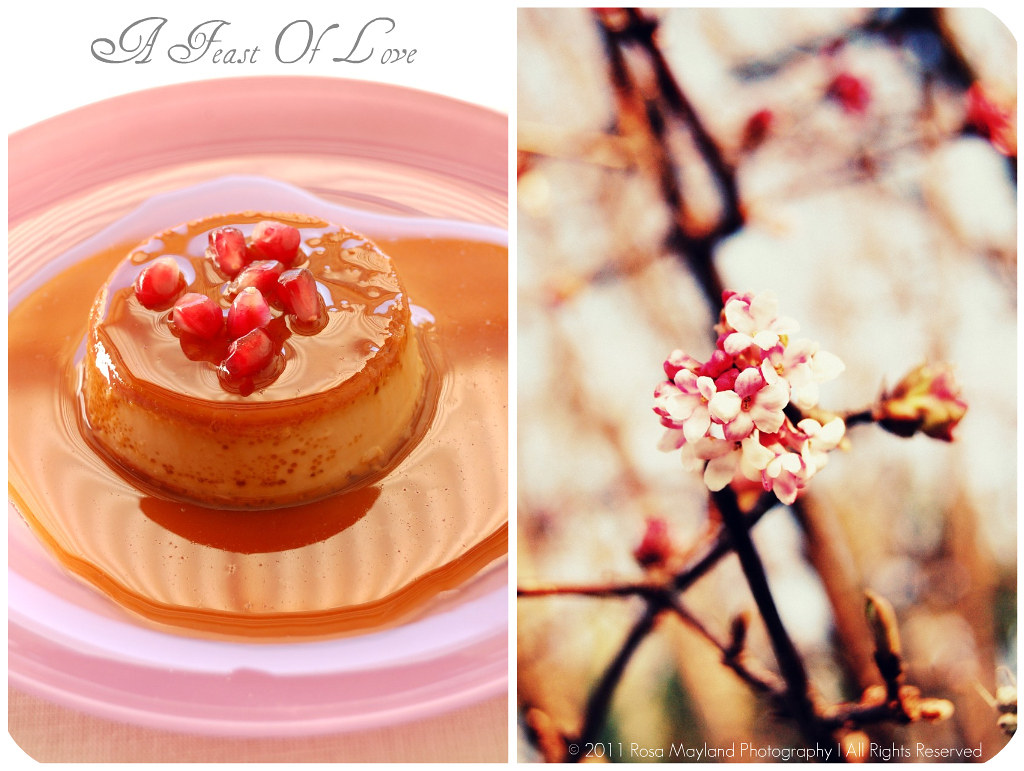
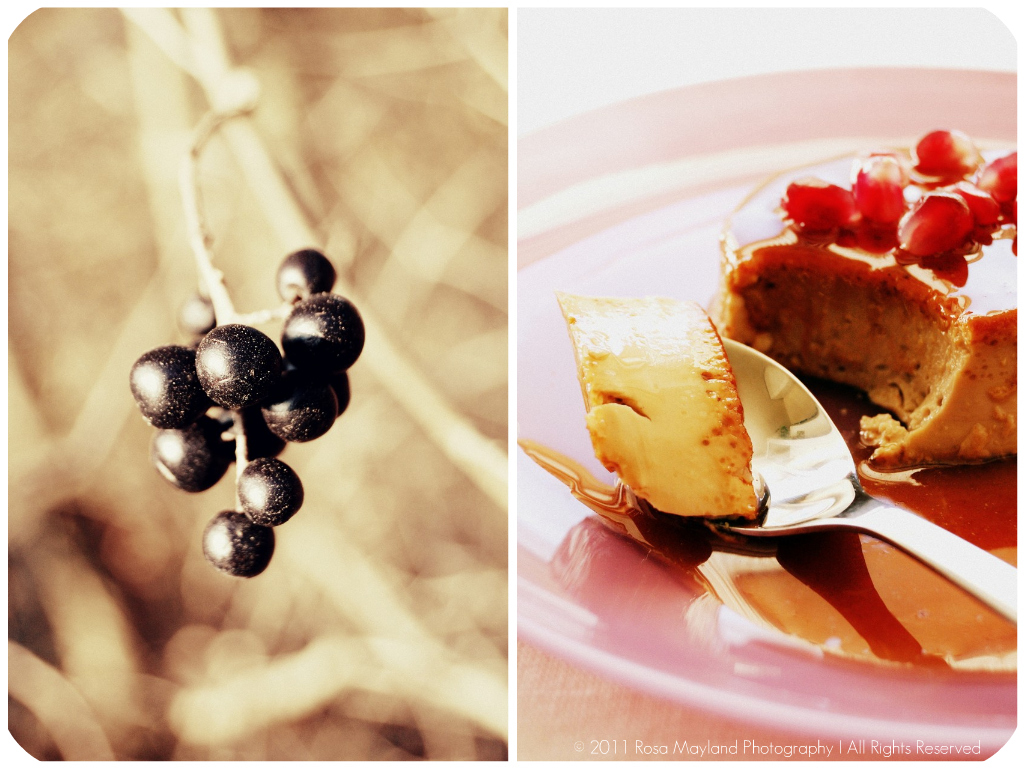
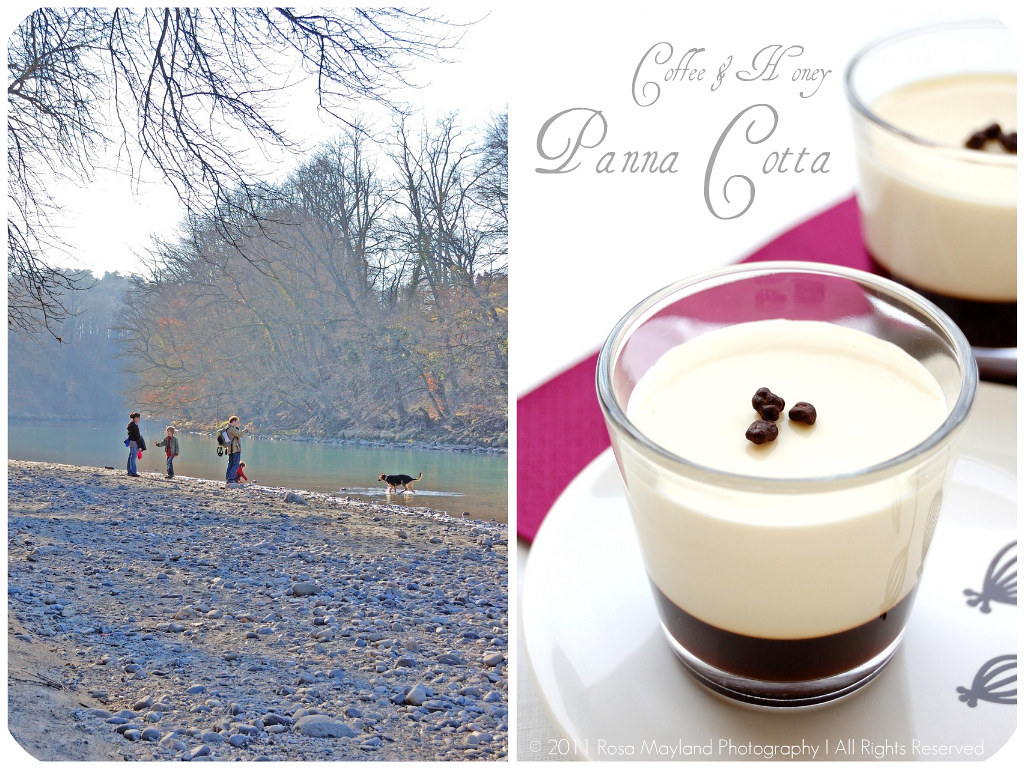
Anyway, despite a few hiccups when it came to the wetness of the dough (I had to add more flour in order for them to not spread out too much - maybe it had to do with the fact that I didn't use corn syrup), the "Florentine Cookies" turned out pretty well and I have to confess that they were deliciously crunchy, addictively chewy as well as oaty. Giada De Laurentiis' "Honey Panna Cotta" were just flawless, creamy, silky, voluptuous, refreshing, delicately flavored, subtly sweet as well as luscious. The Gourmet Magazine "Coffee Jelly" layer at the bottom of each verrine added a delightfully bitter and seductive toasty note to the "Panna Cotta". A perfect contrast which makes this dreamlike pudding more adult and uplifts it's somewhat faint aromas by bringing character and punch to the whole.

"Panna Cotta" will definitely grace my table again as it is very versatile, refined, yet extremely easy to put together. Even my personal tester (boyfriend) who is not in very good terms with jelly thought that it was terrific. And as we are big oatmeal lovers the "Florentine Cookies" had a short life span. The ultimate dessert combination!


Florentines & Panna Cotta Picnik collage 1 bis
~ Florentine Cookies & Vanilla Coffee Panna Cotta ~

Preparation time:
• 20-25 minutes to prepare the Panna Cotta - at least 6 hours to chill
• 20-25 minutes to prepare the cookies 6-8 minutes to bake

Equipment required:
• Small mixing bowl

• Two medium sized heavy bottom pot or saucepan
• Wooden spoon and/or whisk
• Glasses or ramekins - something to pour and serve your Panna Cotta in
• Measuring cups
• Measuring spoons
• Silpat or wax paper or parchment paper
• Baking sheet
• Small bowl

~~~~~~~~~~~~~~~~~~~~~~

Florentines & Panna Cotta Picnik collage 3 bis
Giada's Panna Cotta

Recipe by Giada De Laurentiis.

Ingredients:
1 Cup (240ml) Whole milk
1 Tbs (one packet/15ml/7g/¼oz) Unflavored powdered gelatin
3 Cups (720 ml) Whipping cream (35% butterfat)

1/3 Cup (80ml) Honey (strongly flavored - pine tree for example)
1 1/2 Pure vanilla extract
1 Tbs (15ml/15g/½oz) Granulated sugar

A pinch of salt

Method:
1. Pour the milk into a bowl or pot and sprinkle gelatin evenly and thinly over the milk (make sure the bowl/pot is cold by placing the bowl/pot in the refrigerator for a few minutes before you start making the Panna Cotta).
2. Let stand for 5 minutes to soften the gelatin.
3. Pour the milk into the saucepan/pot and p
lace over medium heat on the stove. Heat this mixture until it is hot, but not boiling, about five minutes (I whisk it a few times at th is stage).
4. Next, add the cream, honey, vanilla, sugar, and pinch of salt.

5. Making sure the mixture doesn't boil, continue to heat and stir occasionally until the sugar and honey have dissolved 5-7 minutes.
6. Remove from heat, allow it to sit for a few minutes to cool slightly. Then pour into the glass or ramekin.
7. Refrigerate at least 6 hours or overnight.
8. Add garnishes and serve.

~~~~~~~~~~~~~~~~~~~~~~

Florentines & Panna Cotta Picnik collage 5 bis
Coffee Gelée For The Panna Cotta

Adapted from this recipe in Gourmet Magazine

Ingredients:
2 Cups (480ml) Good quality brewed coffee

1/4 Cup (60 ml) Hot water + 2 Tbs (30ml) Cold water
1/2 Cup (120ml/115g/4oz) Granulated sugar
1 1/2 Tsps (7½ml/3½g/1/8oz) Unflavored powdered gelatin
2 Tsps (10ml) Pure vanilla extract

Method:
1. Place granulated sugar and 1/4 c. hot water in a small saucepan.
2. Bring to a boil, stir until the sugar has dissolved.

3. Sprinkle gelatin over 2 Tablespoons cold water and let it soften 2 minutes or so.
4. Stir the coffee, sugar, hot water, and vanilla into a small metal bowl, add gelatin mixture and stir well until gelatin has dissolved.
5. Pour into a glass (bottom) or over the panna cotta.

Note:

If pouring over Panna Cotta, be sure that this mixture is no longer hot, it will melt
Panna Cotta if it is, let it come to room temperature.

~~~~~~~~~~~~~~~~~~~~~~

Florentines & Panna Cotta Picnik collage 2 bis
Nestle Florentine Cookies

Recipe from the cookbook “Nestlé Classic Recipes”, and their website.

Makes about 2 1/2 - 3 dozen sandwhiched Florentine cookies.

Ingredients:

2/3 Cup (160ml/150g/5.3oz) Unsalted butter
2 Cups (480ml/160g/5 2/3oz) Quick oats

1 Cup (240ml/230g/8oz) Granulated sugar
2/3 cup (160ml/95g/3⅓oz) Plain (all purp
ose) flour
1/4 Cup (60ml) Dark corn syrup
1/4 Cup (60ml) Whole milk
1 Tsp (5 ml) Pure vanilla extract
A pinch of salt
1 1/2 Cups (360ml/250g/9oz) Dark or milk chocolate


Method:
1. Preheat oven to moderately hot 190° C (375° F).
2. Prepare your baking sheet with silpat or parchment paper.
3. Melt butter in a medium saucepan, then remove from the heat.
4. To the melted butter add oats, sugar, flour, corn syrup, milk, vanilla, and salt. Mix well.
5. Drop a tablespoon full, three inches (75mm) apart, onto your prepared baking sheet.
6. Flatten slightly with the back of your tablespoon, or use a spatula.

7. Bake in preheated oven for 6-8 minutes, until cookies are golden brown.
8. Cool completely on the baking sheets.
9. While the cookies are cooling melt your chocolate until smooth either in a double boiler, or a bowl that fits atop a saucepan filled with a bit of water (make sure the water doesn't touch the bottom of the bowl).
10. Peel the cookies from the silpat or parchment and place face down on a wire rack set over a sheet of wax/parchment paper (to keep counters clean).
11. Spread a tablespoon of chocolate on the bottom/flat side of your cookie, sandw
iching another (flat end) cookie atop the chocolate.

Remarks:
You can also choose not to sandwich yours, in which case, drizzle the tops with c
hocolate (over your wax paper).

~~~~~~~~~~~~~~~~~~~~~~

Etant donné que je suis en vacance et que je n'ai pas beaucoup de temps pour bloguer, je n'ai malheureusement pas pu faire une traduction française de ce billet et je m'en excuse auprès de tous mes amis lecteurs et blogueurs francophones!

C'est pourquoi je vous suggère de vous rendre sur le blog mentionné ci-dessous. Vous y trouverez cette recette en version française.

Chez Isa de "Les Gourmandises d'Isa" (Canada)

Florentines & Panna Cotta Picnik collage 6 bis

Friday, February 18, 2011

PEANUT BUTTER, CHOCOLATE & COFFEE COOKIES BARS

pB Cookie Picnik collage 2 bis
Some people adore peanut butter, others are not too enthusiastic about it and another category of people dislike it totally. If you know me well it is no mystery to you that I am one of those foodies who is gaga about this devilishly luscious, creamy, slightly sweet and rich condiment. As a matter of fact I am bananas about peanuts in general...

One can make so many yummy things and be very creative with peanut butter. From desserts, pastries, sauces to savory dishes you have the choice. There are no
limits when it comes to baking or cooking with it. Just have a look on the net and you'll see that there is an incredible quantity of peanut butter-based recipes on offer. It is impossible not to find one that suits you.

As a child I did my first experiments with peanut butter in England while on holidays at my grandparents. They always had a jar of that gloppy stuff in their pantry. We ate it generally in the morning with "plastic bread" toasts. My grandmother who loves overripe bananas (eeewww, nasty and so sickly!) made sandwiches with peanut butter and slices of that disgustingly blackened fruit. Apart from salted butter it was the only spread I liked to use as ultra-bitter store bought marmalade (no matter it's quality) was never my thing - the homemade version is much better and more refined as well as flavorful.

At home peanut butter was something we bought very seldom and once again it was solely used to accompany bread or crackers. We never ate baked goods made with it, what a pity! Anyway, in opposition to the vast majority of American kids who are fed on PB & Jam sandwiches and adore this snack I have to say that this combination was never my favorite. As a matter of fact I find it really icky. It repulses me quite violently and gives me the shivers, brrrr! On the contrary, I personally find that the association between peanut butter and honey (especially white honey) or peanut butter and Nutella is heavenly and so harmonious as if they were meant to mingle together (that implies only me, of course)!

Peanut butter far from being a contemporary staple. Although we might think that Americ
ans are at the origin of it considering the fact that they consume tons of this goody and since it is impossible to imagine this nation without it, they are just the ones who started commercialising this precious ingredient before anybody else.

Already in 950 B.C. the ancient Incas used peanuts (which originate from South America) to make a paste-like mixture. Early explorers brought plants to Africa, peanuts to Spain (trade) and finally imported them into the American Colonies where they were exchanged against other merchandise. As you can see the USA was not the first country to benefit from that fabulous legume (yes, it's not a nut!). The first commercial peanut crop was grown in North carolina around 1818 and in the early 1840's in Virginia.

It is only in 1890 that an unknown doctor "invented" peanut butter for health benefits and in 1903 that Dr. Ambrose Staub of Saint-Louis (Missouri) patented a peanut butter making machine. By 1914, many companies were producing that speciality, but it became a far more refined produce when in 1928, Joseph L. Rosenfield (the father of Skippy PB) created a churning process that made peanut butter even smoother.

The only time I am thankful for the "discovery" (very debatable though) of the Americas is in a foodie-oriented way. Had the "white bearded men" not set their foot on North or South American soil we might never have been able to develop so many wonderful desserts or dishes made with chocolate (xocolātl), peanuts (cacahuatl) in our treats, potatoes, beans, tomatoes, pumpkins, corn, passionfruits, avocados, pecans, cashews, mango, etc. I can't imagine a life without all these glorious and healthy fruits and vegetables.

Coming back to our much venerated peanut butter I have to admit that I am so obssessed by it and addicted to it's smoothiness as well as gorgeously nutty flavor that I had to eradicate it from my cupboards in order to come clean with my dependence. I ate far too much peanut butter and even gobbled it out of the pot. Now, although my passion for it has not died I can have an open jar next to me and not even reach for it or be tempted by it's contents...

So when I bought my first pot of this delightful substance after a few months of abstinence I knew that I was going to celebrate this event by baking something decadent with it. After flipping through my newly received "The King Arthur Flour's Cookie Companion" cookbook I found what I was looking for: "Peanut Butter Smoothies". As the original recipe was not immoral enough for me I decided to top each slice with additional coffee frosting.

Needless to point out that those infamous blondie-like cookie bars were incredibly soft, visciously gooey and dangerously calorific (the sweetness alone could kill a horse or make an elephant sleep/weak). My "Peanut Butter Chocolate Chips Cookie Bars With Coffee Frosting" are down-right delectable and guaranteed to send you to the heaven's above with a sugar coma and an overdose of pleasure!

PB Cookie Picnik collage 3 bis
~ Peanut Butter Chocolate Chips Cookie Bars With Coffee Frosting ~
Recipe adapted from "The King Arthur Flour's Cookie Companion" cookbook.

Makes 12 slices.

Ingredients For The "Bars":
6 Tbs (90g) Unsalted butter, at room temperature
1/2 Cup (143g) Natural smooth peanut butter
1 Cup (210g) Crystallized sugar

1/4 Cup (60g) Light brown sugar, packed
2 Big eggs

1 Tsp Natural vanilla extract
1 Cup (128g) Unbleached white flour
1/3 Tsp Sea salt
1 Tsp Baking powder
1 Cup (180g) Chocolate chips (bittersweet)

Ingredients For The "Coffee Frosting":
1 Tbs Instant coffee powder
1 Tbs Hot water
3/4 Cup (90g) Powder sugar, sieved
2-4 Tbs Double cream (35% fat)


Method For The "Bars":
1. Preheat the oven to 180° C (350° F).
2. Butter a 20 x 20cm (8 x 8 inches) brownie pan.
3. Mix together the flour, salt and baking powder. Set aside.
4. In a medium bowl, cream the butter and peanut butter together until smooth and
homogenous.

PB Cookie 3 bis
5. Whisk in the sugars until the mixture is light and smooth.
6. Add the eggs, one at a time, whisk well and scrape down the bowl after each addition.
7. Stir in the vanilla.
8. Add the the flour mixture and stir well until combined.
9. Incorporate the chocolate chips.
10. Spread the batter into the prepared pan.
11. Bake for about 30-32 minutes until the edges pull away slightly from the pan.
12. Cool completely before cutting and frosting.

Method
For The "Coffee Frosting":
13. Meanwhile, in a small bowl dissolve the coffee in the hot water.
14. Add the powder sugar and enough cream (in order to get a spreadable mixture). Mix well.

Remarks:
You can replace the bitterwseet chocolate chips by dark, semi-sweet chocolate chips or peanut butter chips.
You can ommit the frosting if you find that those bars are rich enough without it.

Serving suggestions:
Serve for afternoon tea or as an in-between sweet treat with some whipped cream or a scoop of vanilla ice cream and a cup of tea or coffee.

~~~~~~~~~~~~~~~~~~~~~~

PB Cookie Picnik collage 5 bis
~ Barres Au Beurre De Cacahuète, Chocolat Et Glaçage Au Café ~
Recette adaptée du livre "The King Arthur Flour's Cookie Companion".

Pour 12 tranches.

Ingrédients Pour Les "Barres":
90g de Beurre non-salé, à température ambiante
143g de Beurre de cacahuète (sans morceaux)
210g de Sucre cristallisé
60g de Sucre brun clair
2 Gros Oeufs

1 CC d'Extrait de vanille pure
128g de Farine blanche
1/3 CC de Sel de mer fin
1 CC de Poudre à lever
180g de Pépites de chocolat (à 60% de cacao)
Ingrédients Pour le "Glaçage Au Café":
1 CS de Café instantané
1 CS d'Eau chaude

90g de Sucre en poudre, tamisé
2-4 CS de Crème double (35% de mat. grasses)

Méthode Pour Les "Barres":
1. Préchauffer le four à 180° C.
2. Beurrer un moule à brownie de 20 x 20cm.
3. Mélanger ensemble la farine, le sel et la poudre à lever. Mettre de côté.

PB Cookie Picnik collage 4 bis
4. Dans un bol moyen, battre le beurre et le beurre de cacahuète en pommade (le mélange doit être homogène).
5. Ajouter les sucres et battre jusqu'à ce que le mélange soit léger.
6. Ajouter les oeufs, un à un et bien mélanger (nettoyer les bords à l'aide d'une langue de chat après chaque ajout).
7. Incorporer la vanille.
8. Puis incorporer le mélange farine/sel/poudre afin d'obtenir une pâte homogène.
9. Ajouter les pépites de chocolat et bien mélanger.
10. Etaler la pâte dans le moule.
11. Cuire pendant 30-32 minutes, jusqu'à ce que les bords se détachent légèrement du moule.
12. Laisser refroidir complètement avant d'étaler le glaçage.

Méthode Pour le "Glaçage Au Café":
13. Pendant ce temps, dans un petit bol, dissoudre le café instantané dans l'eau chaude.
14. Ajouter le sucre, assez de crème (afin d'obtenir un glaçage étalable) et mélanger.


Remarques:
Vous pouvez remplacer les pépites de chocolat à 60% par des pépites au chocolat au lait ou des pépites de beurre de cacahuète.
Si vous pensez que ces barres sont assez assez riches comme ça, alors il vous est possible d'omettre le glaçage.

Idées de présentation:
Servir pour votre quatre heures ou comme snack et accompagner avec de la crème fouettée, une boule de glace vanille ainsi qu'avec du thé ou du café.

PB Cookie Picnik collage 1 bis

Wednesday, February 16, 2011

AWAKENING & NOVICA GIVEAWAY WINNER

Tea Flans Hen 1.4 bis
Many thanks to all of you for entering my first giveaway. I was delighted to read your lovely comments and to see that so many people from all over the world took part in it. Your participation really means a lot to me.

The winner was democratically selected in a very old-fashioned way, using the hat method. All the names listed in the comment section of the post were placed in a container for a blind draw operated by my boyfriend...

We have a lucky winner, drumroll please!!!!!!!

Congratulations to
CAROLYN JUNG from "Food Gal" who wins the 100$ NOVICA gift certificate!

~~~~~~~~~~~~~~~~~~~~~~

Spring Forrest 1.2 bis

Every day that passes draws us closer to the warmer and greener days. I is incredible to witness how fast nature develops. Already within a few days a myriad of changes have occured.

Spring Landscape 1.1 bis

Spring Field 1.1 bis
Daylight appears earlier and vanishes later, in the morning blackbirds have started to sing in their distinctive spring/summer chant, the grass is getting fluffier, there are catkins everwhere, forsynthias and pink bushes are flowering like crazy and you can already hear cats in heat fighting. Nature is like a well-set clock. Always on time!

Spring Garden 1.1 bis

Hens 1.2 bis

Friday, February 11, 2011

VALENTINE'S DAY TEA-CARAMEL FLANS - FLANS AU THÉ

Tea Flans Picnik collage 1 bis
In case you might not be aware or you live on another planet, Valentine's Day is just around the corner (next Monday). It is quite impossible to miss that event as every store, magazine, radio station, TV channel, newspaper or blog speaks about it. The brainwashing hype has already started weeks ago and if you are a non-comformist like me the "propaganda" might make you feel sick...

Although I believe in love and have nothing against celebrating this fabulous wonder of life I am not a big fan of Valentine's Day as I feel that it is an overrated, materialistic, artificial and very mercantile feast just like Christmas, New Year's Day or Mother's Day. Of course I am aware of the highly romantic origin of this festival (all around the world there are similar days honoring love), but I believe that one should express her/his love on a daily basis and not just once a year otherwise it feels kind of fake, contrived and totally unnatural.

Valentine's Day is synonymous of love, passion and commitment, but on the other side of the coin things are not all that glittery. All the unnecessary money, tears, fights, obligations, comparisons between gifts and worries. Is it really necessary? Many men feel pressurized and obliged to make this day as unforgettable as possible or else they would be severely reprimanded by their other half, so they sheepishly buy something - many times anything kitschy that is proposed in stores who are delighted by the commercial value of the 14th of February. They feel as if taking part in some kind of competition and are panicked at the idea of not living to their wive's, girlfriend's or even their mother in law's selfish expectations (which mostly are created by society) and are afraid of getting dumped, criticized and misjudged if they do something wrong. What a stress! I really feel for them...

Why make things so complicated and follow the flock when you can free yourself from such ties and live your love in a much healthier way? It is for such reasons that I have never asked to be treated like a princess on Valentine's Day and never make a big deal out of it. My boyfriend is free to remember or not this date. I know that he loves me nonetheless.

To tell you the truth we have very rarerly celebrated this day as we are unconventional people
who don't believe in forced action. It would be a lie if I said that we don't enjoy being spoilt be the other or receiving gifts like anyone else, yet compared to others we don't limit that to one day of the year. Every weekend we organize charming tête-à-têtes, candlelit meals and always try to by as affectionate towards one another and show our feelings through little nothings (buying ones favorite chocolate, baking a treat, making a concession, helping the other in difficult times, being tolerant and respectful, etc...). Buying gifts is easy, yet showing real love for your partner demands more efforts.

So when I received a box full of tea samples from "Le Palais Des Thés" (go in my blogroll for a link to their store) and was lucky to discover their heavenly "Thé Des Amants (translation: Lover's Tea) I knew that I was going to indulge my dessert-needy soulmate with a delightful homemade tea-based treat that would fill his tummy with love and bring some sweetness into the evening.

It is undoubtedly one of my favorite flavored teas. It's sensual perfume is e
xhalirating and every wiff or sip of it uplifts your soul in the most wonderful of ways. It is a perfect blend of black tea that fits the Valentine's Day spirit very well as it is very rich, voluptuous, refined, suggestively fragrant. With it's hints of ginger, apple, almonds, cinnamon and vanilla you'll be under it's spell.

"Thé Des Amants" is such an exceptional tea and has a really amazing taste that it is impossible to just drink it, one also wants to eat it! Therefore I decided upon making a dessert that I found in my new bible "Bon Appétit Desserts: The Book Of All Things Sweet And Wonderful" and adding my own little twist to it.

I thought that it would be interesting to create individual "Tea Caramel Flans" and ins
tead of flavoring them with vanilla I opted for a more atypical and original way of seasoning that delicacy by steeping my cream/milk mixture with a few teaspoons "Thé Des Amants" tea . An amazing idea which gave excellent results.

Those easy-to-make flans were a huge hit. They were deliciously smooth and creamy, had a subtly spicy flavor and were dazzlingly caramelly
(both aromas melded incredibly well together) and looked terrific. There was only minus point though. My flans had slightly porous edges even if I was careful when whisking the custard ingredients. Even if I did my best not to beat the eggs excessively, I still ended up with tiny and unsexy holes that plagued the sides of my flans. Not a matter of life and death, but a bugger nonetheless...

Anyway my "Tea Caramel Flans" disappeared as fast as I had made them! My boyfriend found them flawless and gulped them down with much pleasure. Mission accomplished!

Tea Flans Picnik collage 2 bis
~ Tea-Caramel Flans ~
Recipe adapted from "Bon Appétit Desserts: The Book Of All Things Sweet And Wonderful".

Serves 6.

Ingredients For The "Flans":
1 3/4 Cups (420ml) Double cream (35% fat)

1 Cup (240ml) Milk (no low-fat or nonfat)

1/3 Tsp Sea salt

3 1/2 Tsps Thé Des Amants by Le Palais Des Thés (link in the top of my blogroll)
3 Large Eggs
2 Large Yolks
7 Tbs Castor sugar
Ingredients for the "Caramel":

1 Cup (210g) Castor sugar
1/3 Cup (80ml) Water

Method:
1. Position a rack in the center of the oven and preheat to 180° C (350° F).
2. In a heavy medium pan, mix together the cream, milk and salt.
3. Over medium heat, bring to a simmer and add the tea, then remove from the heat an
d let steep for about 30 minutes.
4. Meanwhile, in another heavy medium pan combine 1 cup sugar and 1/3 cup water.
5. Stir over low heat until the sugar has completely dissolved.
6. Increase the heat to high and cook without stirring until the syrup turns deep amber (brushing down sides of pan with wet pastry brush and swirling pan occasionally), about 10 minutes.
7. Hastily pour the caramel into six 3/4-cup (180ml) ramekins or custard cups.


Tea Flans Picnik collage 6 bis
8. Using oven mitts as aid, immediately tilt each ramekin to coat the sides.
9. Put the ramekins into a rectangular deep baking pan and bring a medium pan of water to the boil (set aside).
10. In a medium bowl, lightly whisk together the eggs, egg yolks and 7 tbs sugar just until blended.
11. Gradually pour the cream mixture (through a sieve) into the egg mixture while continuously whisking without creating lots of foam.
12. Sieve the custard through into a Pyrex measuring cup and pour the mixture into the prepared ramekins, dividing evenly.
13. Pour enough of the hot water into the baking pan. It has to come halfway up side
s of ramekins.
14. Bake for about 40 minutes until the center of the flans are gently set but still a little wobbly.
15. Transfer the flans to a rack and let cool.

16. Place in the fridge until completely cold, about 2 hours.
17. Cover with cling film and chill overnight.
18. Just before serving, run a small sharp knife around the sides of the flans, to loo
sen and turn over onto plate. Shake very gently in order to release the flans. Carefully lift off the ramekins, allowing the caramel syrup to run over the flans.

Remarks:
If you don't want to use tea, then scrape a vanilla bean into the cream mixture (step 2) and add the bean.
Don't overwhisk the eggs otherwise you'll not get a perfectly smooth edges.
I suggest that you take the caramel off the burner when it's just "medium" amber rather than dark amber (it continues to cook and darken once off the heat).
The flans can be made 2 days ahead.

Serving suggestions:
Serve for dessert and garnish with pomegranate seeds or berries (strawberries, blueberries and raspberries).

~~~~~~~~~~~~~~~~~~~~~~

Tea Flans Picnik collage 3 bis
~ Flans Au Caramel Et Au Thé ~
Recette adaptée du livre "Bon Appétit Desserts: The Book Of All Things Sweet And Wonderful".

Pour 6 personnes.

Ingrédients Pour Les "Flans":
420ml Crème double (35% de mat. grasse)

240ml de Lait (uniquement du lait entier à 3.5% de mat. grasse)

1/3 de CC de Sel de mer fin
3 1/2 CC de Thé Des Amants par Le Palais Des Thés
(voir mon "blogroll" pour le lien)
3 Gros Oeufs

2 Gros Jaunes d'oeufs
7 CS de Sucre cristallisé
Ingrédients Pour Le "Caramel":

210g de Sucre cristallisé
80ml d'Eau

Méthode:
1. Positionner une grille au milieu du four et préchauffer à 180° C.
2. Dans une casserole moyenne, mélanger ensemble la crème, le lait et le sel.
3. A feu moyen, porter le mélange à ébullition et ajouter le thé, puis retirer du feu et laisser tirer pendant 30 minutes.

4. Pendant ce temps, dans une autre casserole moyenne mélanger ensemble de sucre cristallisé et l'eau.
5. Cuire à feu doux et remuer constamment jusqu'à ce que le sucre soit complètement dissout.
6. Augmenter la température (haute) et faire cuire sans remuer jusqu'à ce que le sirop devienne ambré (tout en
remuant délicatement la casserole pour répartir le caramel mais sans éclabousser les parois), pendant 10 minutes.
7. Verser rapidement le caramel dans 6 ramequins de 180ml chacuns.

Tea Flans Picnik collage 5 bis
8. En se protégeant avec des gants, immédiatement remuer les ramekins afin que le fond et les côtés soient recouverts de caramel.
9. Mettre les ramequins dans un plaque de cuisson profonde et remplir une casserole moyenne avec de l'eau, puis portez à ébullition et mettre de côté.
10. Dans un bol moyen, battre (légèrement) ensemble les oeufs, jaunes d'oeufs et 7 CS de sucre cristallisé afin d'obtenir un mélange homogène.

11. Verser graduellement le mélange à la crème (en le filtrant) dans le mélange aux oeufs tout en remuant sans créer de la mousse.
12. Filtrer l'appareil à flan et remplir les ramequins de manière égale.
13. Verser assez d'eau chaude dans la plaque de cuisson afin que l'eau arrive à mi-hauteur des moules.

14. Cuire pendant 40 minutes, jusqu'à ce que le centre des flans soit ferme, mais toujours tremblotant.
15. Transférer les flans sur une grille afin qu'ils refroidissent.

16. Les mettre au frigo jusqu'à ce qu'ils soient complètement refroidis, pendant 2 heures.
17. Couvrir les pots avec du film plastique et laisser au frigo tout une nuit.

18. Juste avant de servir, libérer les bords avec une couteau pointu et renverser délicatement sur une assiette. Secouer très légèrement afin que les flans se libèrent. Retirer les ramequ ins et lasser le caramel couler sur les flans.

Remarques:

Si vous ne voulez pas utiliser du thé pour parfumer vos flans, alors ajoutez une gousse de vanille ouverte et raclée au mélange à la crème (point 2).
Ne battez pas les oeufs trop énergétiquement autrement vous n'obtiendrez pas des bor ds lisses.
Je vous recommande de retirer complètement le caramel du feu lorsqu'il est moyennement ambré et non quand il est trop sombre (il continuent à cuire et à brunir hors du feu).
Les flans peuvent être préparés 2 jours à l'avance.

Idées de présentation:
Servir pour le dessert et garnir avec des graines de grenade ou des baies (fraises, myrtilles ou framboises).

Tea Flans Picnik collage 4 bis

Friday, February 4, 2011

BAKED KIBBEH - KIBBEH AU FOUR

Kibbeh Picnik collage 3 bis
Lebanon. This name sounds very poetic, don't you think? Pronounce this unique, bewitching word and you'll get me phantasizing about refined and dreamlike dishes with exhalirating aromas and fragrant perfumes, antique temples still standing triumphantly even when in ruin, glorious ancient empires full of mystique (Phoenician, Assyrian, Babylonian, Persian, Macedonian, Roman & Byzantine), busy markets with stalls exploding with fresh veggies, fruits, spices, dried fruits and exquisite desserts, gorgeous sunny landscapes, snowy mountain tops, flat desertic plains, luscious pine tree forests and postcard-like coastlines, small coffee shops and restaurants crowded with men and women casually enjoying a delightful meals and sipping on their coffees or arak, and hospitable as well as frindly people who open the doors of their homes to visitors and happily share their meal with you. All of that might not be very accurate or the same in reality, but it is nonetheless what this complex country inspires me...

One thing I am sure of though is that the Lebanese rich gastronomic traditions have a lot to offer for gourmets like me and there is no doubt about the reasons why this place's cuisine is venerated all around the world. It's deliciousness is incomparable. Absolutely no myth here. If you already know the century-old Lebanese cuisine, then you know that I'm not lying and if you have never tasted it, well I can only assure you that you must immediately remedy this situation as you most likely have missed out on a fabulous experience.

Every time I plan to prepare a yummy dish for the weekend, I in
variably pick up one of my Middle Eastern cookooks and leaf through it's page while drooling. For me, that kind of is synonymous of culinary enlightment and extreme epicurian pleasure. I am constantly amazed by the recipes hailing from that region of the globe. But there is no mystery to why I am attracted to such wonderful exotic eats. I am crazy about spices, lamb, poultry, pilafs, mezze, dips, sticky and nutty desserts, flat breads and bulghur. Such goodies have a drug-like effect on me.

Being a really well-organized foodie who behaves like a squirrel (a stock freak) I always make sure that my cupboards and freezer are garnished with a vast array of ingredients (tons of spices, grains, legumes, pastes, sauces, herbs, cans, meat, etc..). In that way, it leaves me the opportnity to cook or bake more or less anything I want without having to run out to the supermarket.

As my pantry is a treasure trove just like Ali-Baba's cave and it hides many gems, I had no problem putting together one of Lebanon's national dishes, a "Kibbeh" that I had spotted in Claudia Roden's excellent book "Arabesque: A Taste of Morocco, Turkey, and Lebanon". Thanks to my tendency to accumulate goods I had everything at hand. The ground lamb meat was in the freezer, a bag of pine nuts that needed to get used was sitting on my dried fruit shelf, a bottle of pomegranate molasses was carefully kept in the sauce section of the counter next to the oven, a packet of bulghur was stocked in my IKEA cart and both the cinnamon as well as the allspice were waiting for me in the spice cabinet. Perfect!

The name "Kibbeh" derives from the Arabic word "kubbah" meaning "ball". This delicacy is one of the Levantine cuisine's most
widespread dishes and can be found in Syria, the Palestinian territories, Jordan, Iraq, Turkey, Iran, Egypt, the Arabian Penninsula, Armenia, Israel, Latin America (Brazil,Colombia, Cuba, the Dominican Republic, Honduras or Mexico - imported by the Syrian & Lebanese dispora) and Cyprus. This course is made with bulghur (sometimes even with rice), meat (also fish, pumpkin or potatoes) and spices. There are different varieties (vegetarian, balls, oval-shaped, patties that are either baked, cooked in broth, yoghurt, bitter orange juice or fried and there's even one version that is very similar to tartare and consists of raw meat), but the most common of them is the torpedo-shaped croquettes that are stuffed with minced beef or lamb and are deep-fried.

Making "Baked Kibbeh" for the first time was no big deal for me, thanks to my food processor and my years of experimenting with cooking. The preparation required no particular skill and was not messy, long nor complex. It was quite straightforward and idiotproof, but what came out of the oven was far from being plain or simple.

With it's complex and refined flavors, this Middle-Eastern meatloaf is extremely palatable. The meat base is soft, moist and meatilicious, and is crowned a sweet, sour, savory onion and pinenut topping. This "Baked Kibbeh" can be served hot or at room temperature as a mezze (cut in small pieces) or main dish, and makes a grandiose potluck or picnic dish that will be wolfed by adults and kids alike. With the leftovers you can even create a scrummy sandwich (use pita, fattoush breads or baguette Parisienne and add the spread of your choice - yoghurt, "Tarrator Sauce", "Baba Ganoush" or "Hummus").

Kibbeh Picnik collage 4 bis
~ Kibbeh Saniyeh ~
Recipe adapted from "Arabesque: A Taste of Morocco, Turkey, and Lebanon" by Claudia Roden.

Serves 4.

Ingredients For The "Baked Kibbeh" Base:

2/3 Cup (160g) Fine-ground bulgur
1 Medium white onion, cut into quarters
1 Pound (500g) Lean ground lamb (lean & boneless cubed leg of lamb)
1 Tsp Sea salt
Ground black pepper, to taste
1 1/2 Tsp Ground cinnamon
1+1 Tbs Vegetable oil (to grease the pan and the top of the kibbeh)
Ingredients For The "Onion & Pine Nut Topping":

1 Pound (500g) White onions, sliced (half-moon)
3 Tbs Extra-virgin olive oil
1/3 Cup (50g) Pine nuts
Sea salt, to taste
Ground black pepper, to taste
1/2 Tsp Ground cinnamon
1/3 Tsp Ground allspice
3 Tbs Pomegranate molasses
Method For The "Baked Kibbeh" Base:
1. Cover the bulgur with water and let rest 10 minutes. Drain well.
2. In a food processor, purée the onion, then add the meat, salt, pepper, and cinnamon. Blend to a fine paste.
3. Add the drained bulgur and blend again in order to get a smooth, homogenous a
nd soft paste.
4. Preheat the oven to 190° C (375° F). Oil a 26cm (10inch) diameter tart pan/dish and then press the paste into the bottom of the pan/dish with your hands.
5. Flatten and sm
ooth the top. Rub with 1 tablespoons oil.
6. With a pointed knife, cut the kibbeh into 6 wedges through the center, and run the knif
e around the edges of the dish to release them.
7. Bake the kibbeh in the preheated oven for about 30-40 minutes, until browned.

Kibbeh 4 copy bis
Method For The "Topping":
8. Meanwhile, fry the onions in the olive oil until they are golden brown, stirring often.
9. Add the pine nuts. Stir-fry until lightly golden.
10. Salt and pepper to taste, then add the cinnamon, allspice and the pomegranate molasses.
11. Continue cooking and stirring for about 1 minute.
12. Spread the onion mixture over the top of the kibbeh and serve.

Remarks:

You can replace the pinenuts by 2/3 cup (90g) shelled walnuts, broken into pieces.
If you wish, you can also add 2 tablespoons raisins that have been previously soaked in water for 15 mi
nutes and drained (in case you are using the raisins, ommit the pomegranate molasses) or add 1 tablespoon sumac to the onion topping (then ommit the pomegranate molasses).

Serving suggestions:
Serve hot or at room temperature, alone or with a salad, a dollop thick yoghurt,
"Tarrator Sauce", "Baba Ganoush" or "Hummus".

~~~~~~~~~~~~~~~~~~~~~~

Kibbeh Picnik collage 2 bis
~ Kibbeh Au Four ~
Recette tirée et adaptée du livre "Arabesque: A Taste of Morocco, Turkey, and Lebanon" de Claudia Roden.

Pour 4 personnes.

Ingrédients Pour le "Kibbeh":

160g de Boulghour fin
1 Onion blanc (moyen), coupé en quatre
500g de Viande d'agneau hachée maigre (ou du gigot d'agneau désossé et coupé en cubes)
1 CC de Sel de mer
Poivre noir moulu, selon goût
1 1/2 CC de Cannelle en poudre
1+1 Cs d'Huile végétale
Ingrédients Pour La "Garniture Aux Oingons":

500g d'Oignons blancs, coupés en demi-lune
3 CS d'Huile d'olive extra vierge
50g de Pignons de pin
Sel de mer, selon goût
Poivre noir moulu, selon goût

1/2 CC de Cannelle en poudre
1/3 de Tout-épice en poudre
3 CS de Mélasse de grenade

Méthode Pour le "Kibbeh":
1. Recouvrir le boulghour avec de l'eau et mettre de côté pendant 10 minutes. Bien égoutter.
2. Dans
un mixer, réduire l'oignon en purrée, puis ajouter la viande, le sel, le poivre et la cannelle. Mixer afin d'obtenir une sorte de pâte.
3. Ajouter le boulghour égoutté et mixer à nouveau afin d'obtenir une pâte collante, homogène et fine.
4. Préchauffer le four à 190° C. Huiler un moule à tarte de 26cm et presser (avec les mains) la pâte dans le moule.
5. Bien applatir et lisser le dessus. Peindre avec 1 CS d'huile.
6. A l'aid
e d'un couteau pointu, couper le kibbeh en 6 tranches égales (comme pour une tarte) et passer le couteau dans les bords afin de les libérer.
7. Cuire le kibbeh dans le four préchauffé pendant 30-40 minutes, jusqu'à ce qu'il soir doré.

Kibbeh Picnik collage 5 bis
Méthode Pour La "Garniture Aux Oingons":
8. Pendant ce temps, faire frire les oignons dans l'huile d'olive tout en remuant de temps à autre,
9. Ajouter les pignons de pin. Continuer à cuire jusqu'à ce que les pignons soient dorés.
10. Saler et poivrer, puis ajouter la cannelle, le tout-épice et la mélasse.
11. Cuire encore penadant 1 minute tout en remuant.
12. Etaler la garniture sur le dessus du kibbeh et servir.


Remarques:
Au lieu d'utiliser des pignons de pins, vous pouvez préparer ce plat avec 90g de noix , grossièrement concassées.
La garniture peut aussi être faite avec 2 CS de raisins secs qui ont été trempés pendant 15 minutes et égouttés avant utilisation (dans ce cas, omettez la mélasse
) ou bien il vous est aussi possible d'ajouter 1 CS de sumac (dans ce cas aussi, omettez aussi la mélasse).

Idées de présentation:
Servir chaud ou à température ambiante et accompagner avec une salade ou du yaourt à la grecque, du
"Baba Ganoush" ou du "Hummus"..

Kibbeh Picnik collage 1 bis